10 MINS YOGA POSES FOR WEIGHT LOSS
Yoga was mentioned in the Indian collection of Vedic Sanskrit hymns, the Rigveda. Researchers have traced yoga to over a thousand years ago, and its rich history is divided into periods of innovation, practice, and development.
YOGA will not only de-stress you, but it will get you sweaty and shaky in just a few minutes. Add this 10-minute blast into your usual practice, or use it as a quick workout when you don’t have time to hit the gym.
In spite of your busy schedule, you can also attend yoga classes according to your convenience, and download yoga videos and take them anywhere you go and practice them without any disturbances. (Click Here To Download The Yoga Videos)
Looking for the perfect yoga workout for weight loss that’s beginner-friendly and saves you time? We got you!
The reason yoga works so well for weight loss is that it is a body weight-based workout that helps burn body fat into lean muscle mass, which in turn boosts your metabolism, making losing weight easier.
But the type of yoga you do and how often you do it matters immensely when it comes to meeting your weight loss goals.
The discipline has 5 basic principles:
* Exercise
* Diet
* Breathing
* Relaxation
* Meditation
Let's scroll down to see that yoga poses that help in weight loss
- REVERSE WARRIOR :
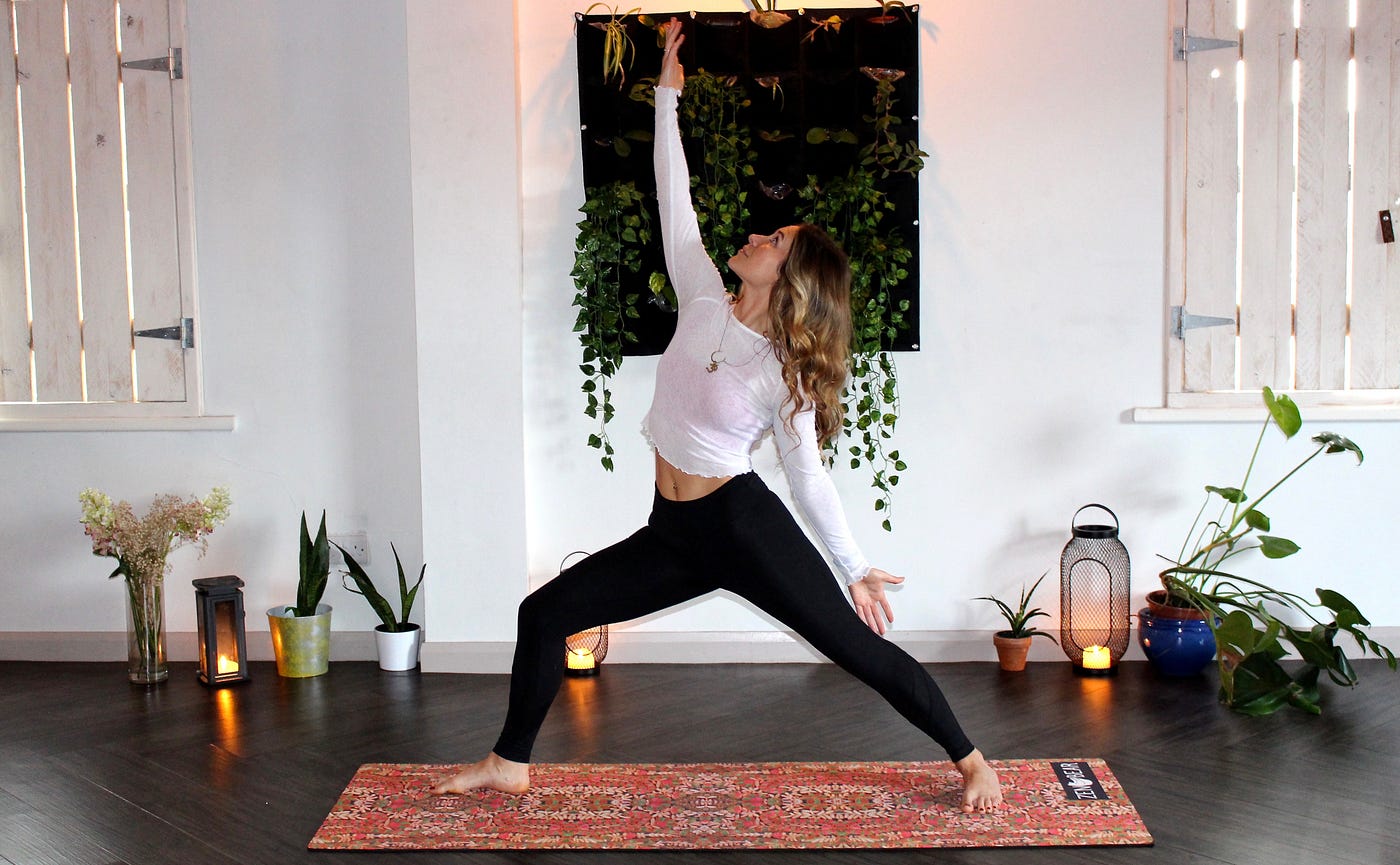
SANSKRIT NAME: Viparita Virabhadrasana
STEP 1: With your knee tracking over the center of your foot and still at a 90-degree angle, spin your back heel in and windmill your arms open to warrior 2, with arms reaching out in alignment with your shoulders, palm pressing down.
STEP 2: Your back leg should be straight and firm. Flip your front palm upward and reach back as you slide your hand down your back leg. Spiral your chest up toward the ceiling. Breathe here for 30 seconds and repeat on the opposite side.
2.DOWNWARD FACING DOG :

SANSKRIT NAME: Adho Mukha Svanasana
STEP 1: Come down to all fours.
STEP 2: Keep your hands slightly forward of your shoulders.
STEP 3: Curl your toes under, straighten your legs, and lift your hips up and back into a downward-facing dog.
STEP 4: Firm your upper outer arms and relax your neck. Hold for up to 1 minute.
3.SPHINX : — 30 SECS
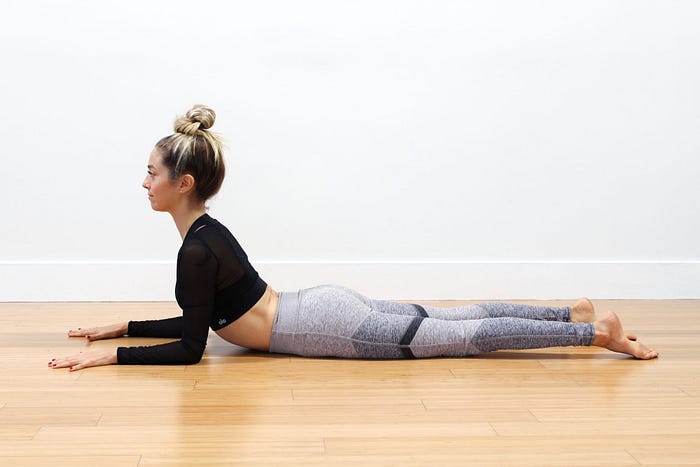
SANSKRIT NAME: Salamba Bhujangasana
STEP 1: Keep your forearms in forearm plank alignment.
STEP 2: Lower your torso and legs to the mat.
STEP 3: Press your forearms down as you lift your chest up and extend your sternum to the sky. Take five deep breaths.
STEP 4: Shift back to the child’s pose for a few breaths and then flip over onto your back.
STEP 5: Do it for 30 seconds.
4. STANDING SIDE LEAN :

SANSKRIT NAME: Parsva Urdhva Hastasana
STEP 1: sides of body, arms Sweep arms overhead and interlace fingers, except index and thumb.
STEP 2: Gently squeeze arms toward ears.
STEP 3: On an inhalation, press feet down, engage thighs, and stretch up and evenly over to right.
STEP 4: On an exhalation, gather belly into the back, press feet down, and return to center. Repeat on the left side.
STEP 5: Do each side 4 times, then return to Mountain pose.
5. PLANK POSE :

SANSKRIT NAME: Chaturangadandasana
STEP 1: Sit in a thunderbolt pose.
STEP 2: Walk your hands forward and come in plank pose with your hands under your shoulders.
STEP 3: Straighten your legs, till they are a few inches above the ground and parallel to it, with your toes turned inwards.
STEP 4: On exhalation, bend your elbows until your shoulders are at the same height as your elbows.
STEP 5: Exhale. Come up to plank pose. Exhale
6.TRIANGLE POSE :
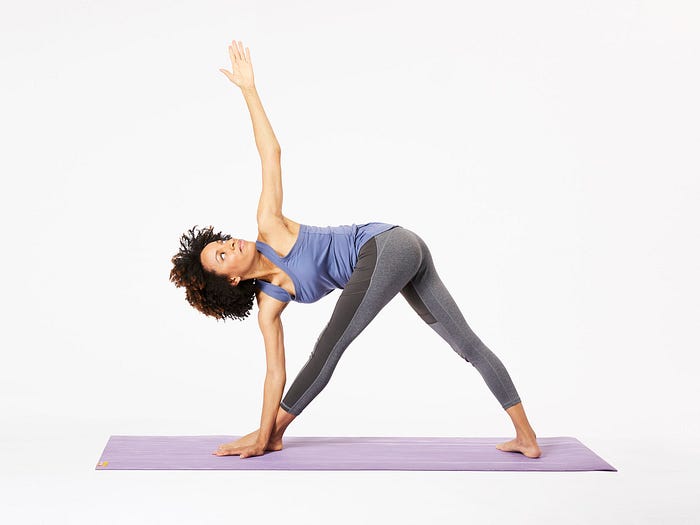
SANSKRIT NAME: Trikonasana
STEP 1: Stand straight with your legs apart.
STEP 2: Inhale.
STEP 3: Exhale.
STEP 4: Simultaneously, slide your left arm down along your left leg till your fingers are at your ankle.
STEP 5: At this point, your right arm must be horizontal as your head is tilted left.
STEP 6: Hold the pose with your knees and elbows straight.
Inhale.
7.SHOULDER STAND :
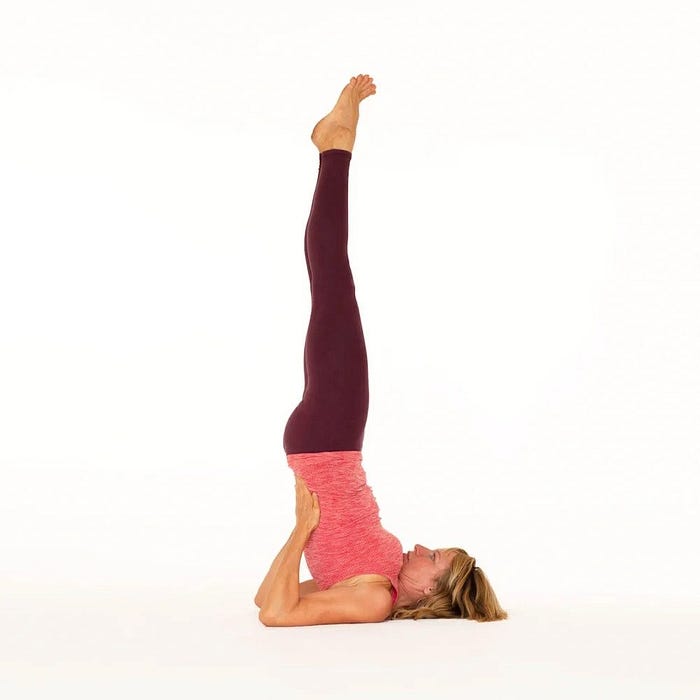
SANSKRIT NAME: Sarvangasana
STEP 1: Lie on your back with your knees bent and your feet flat on the floor at hip-width, resting your arms along the sides of your body with your palms down.
STEP 2: As you exhale, push your palms down, draw your bent knees in and up, and then straighten your legs as you raise your hips to a comfortable angle of 45 to 75 degrees.
STEP 3: Bend your elbows and bring your hands to the back of your pelvis and then slide your hands up to your lower back.
STEP 4: Make sure your legs are straight but your knees aren’t locked and your feet are directly above your head. Press your elbows and the backs of your upper arms on the floor for support. Relax your neck.
STEP 5: Stay in Step 3 for as long as you feel comfortable, or up to 5 minutes.
STEP 6: When you want to come down, first ease your hips to the floor with the support of your hands and then bend your knees and lower your feet to the floor.
8.BRIDGE POSE :
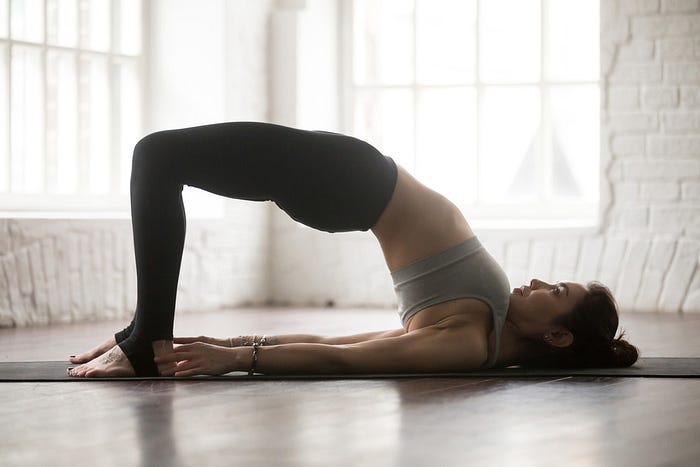
SANSKRIT NAME : Sethu Bandha Sarvangasana
STEP 1: Lying on your back, place your feet flat on the floor, a comfortable distance away from the hips
STEP 2: Place your arms next to the ribcage. You can either bend your elbows 90 degrees so that your fingers are pointing to the ceiling or hold onto the outer edges of your mat
STEP 3: On an inhalation, press the back of your shoulders and your feet into the floor and lift your hips up
STEP 4: Press the inner feet down actively and keep the knees from spreading out wide, by engaging the inner thighs
STEP 5: Lengthen your tailbone, slide your shoulder blades down your back and keep your neck neutral
STEP 6: You can clasp your hands behind your back
STEP 7: Stay for 5 to 15 breaths
STEP 8: To come out of the pose, release the arms and roll your spine down on an out-breath
9.TWISTED CHAIR POSE :
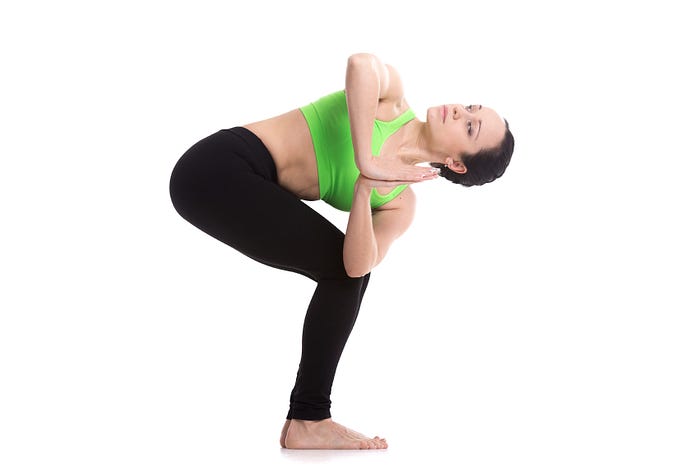
SANSKRIT NAME : Parivrtta Utkatasana
STEP 1: Begin in Mountain pose(Tadasana). Stand with your feet together, with your big toes touching. Beginners can stand with their feet hip-distance apart.
STEP 2: Inhale and raise your arms above your head, perpendicular to the floor.
STEP 3: Exhale as you bend your knees, bringing your thighs as parallel to the floor as they can get. Your knees will project out slightly over your feet and your torso will form an approximate right angle over your thighs. This is Chair Pose.
STEP 4: Lower your arms and bring your palms together in a prayer position at your chest.
STEP 5: Exhaling, twist your torso to the right. Bring your left elbow to the outside of your right thigh.
STEP 6: Shift your left hip back slightly, squaring off your hips once again. Bring your knees into alignment.
STEP 7: Press your upper left arm against your thigh and draw your right shoulder blade into your back to turn your chest to the right.
STEP 8: To deepen the pose, extend both arms, reaching your right fingertips to the sky and your left fingertips to the mat. You can also place your left hand on a block.
STEP 9: Turn your gaze to the sky. If your arms are extended, gaze at your top thumb.
STEP 10: Bring your hips down even lower. Lengthen your spine even further on your inhalations and twist even deeper on your exhalations. Stack your top shoulder above your bottom shoulder. Draw your thumbs to your heart, and your heart toward your thumbs.
STEP 11: Keep your weight in your heels and keep your feet pressing firmly together.
STEP 12: Hold for up to one minute. Inhale as you return to the center, reaching both arms overhead in a chair pose. Straighten your legs, lifting through your arms. Exhale to release back to Mountain pose(Tadasana). Repeat on the other side.
10.BOW POSE :
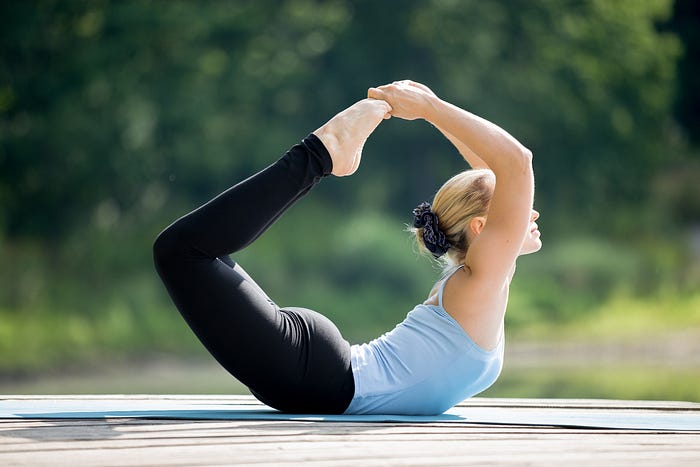
SANSKRIT NAME : Dhanurasana
STEP 1: Lie on your belly with your hands alongside your torso, palms up. (You can lie on a folded blanket to pad the front of your torso and legs.) Exhale and bend your knees, bringing your heels as close as you can to your buttocks.
STEP 2: Reach back with your hands and take hold of your ankles (but not the tops of the feet). Make sure your knees aren’t wider than the width of your hips and keep your knees hip-width for the duration of the pose.
STEP 3: Inhale and strongly lift your heels away from your buttocks and, at the same time, lift your thighs away from the floor. This will have the effect of pulling your upper torso and head off the floor. Burrow the tailbone down toward the floor, and keep your back muscles soft.
STEP 4: As you continue lifting the heels and thighs higher, press your shoulder blades firmly against your back to open your heart. Draw the tops of the shoulders away from your ears. Gaze forward.
STEP 5: With the belly pressed against the floor, breathing will be difficult. Breathe more into the back of your torso, and be sure not to stop breathing.
STEP 6: Stay in this pose anywhere from 20 to 30 seconds. Release as you exhale, and lie quietly for a few breaths. You can repeat the pose once or twice more.
You May Also Know About:
5 HEALTHY HABITS OF A FIT WOMEN
8 EFFECTIVE GYM WORKOUT FOR BEGINNERS
10 BEST POSTPARTUM WORKOUT MOVES FOR NEW MOMS
7 BEST INTENSIVE THIGH WORKOUT TO GET TONED THIGHS
5 HEALTHY DESSERT RECIPES THAT DOESN'T RUIN YOUR DIET
